Car Park Management System is developed using PHP, CSS, and JavaScript. It contains an admin side and user side from where a user can book/unbook parking lot easily. From the admin panel, he/she can maintain daily transactions and manage bookings. The Admin plays an important role in the management of this system. In this project, the user has to perform all the main functions from the Admin side.
About Car Park Management System In PHP
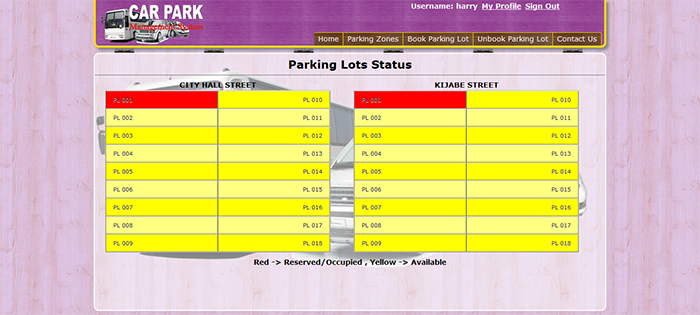
In order to book parking lot, the user has to enter his/her car model, select vehicle type. Then the user has to fill up parking details such as plate number, payment information etc. After all this, the system will redirect the user towards booking date and time. He/she can easily look/check for available, occupied parking lot status; which is indicated which yellow and red color.
The admin can list and manage all the available users. He/she can also list all the bookings and manage them easily. The admin can maintain daily transactions which show date and time, confirmation code, and amount. At last, all the received messages are managed from the admin panel. The features of this project can be summarized as –
- Admin Panel
- Book/Unbook parking lot
- Check parking lot status
- Register user
- Contact
- View bookings
- Manage daily transactions and messages
How To Run Car Park Management System In PHP ?
Design of this project is pretty simple so that the user won’t find any difficulties while working on it. Car Park Management System in PHP helps in easy management of booking parking lots and checking status. To run this project you must have installed virtual server i.e XAMPP on your PC (for Windows). After Starting Apache and MySQL in XAMPP, follow the following steps
- Extract file
- Copy the main project folder
- Paste in xampp/htdocs/
Now Connecting Database
- Open a browser and go to URL “http://localhost/phpmyadmin/”
- Then, click on the databases tab
- Create a database naming “cpms” and then click on the import tab
- Click on browse file and select “cpms.sql” file which is inside “DATABASE” folder
- Click on go.
After Creating Database,
- Open a browser and go to URL “http://localhost/cpark/”
For Admin Panel
- Go to “http://localhost/cpark/0”
Provide the username and password which is provided inside the “Readme.txt” file.


